Adding an API Action
To extend the capabilities of your Suppa digital assistant, you can add custom APIs.
Suppa uses OpenAPI JSON
schema for defining the request body of the API. This helps the AI understand
how to structure requests to your API correctly.
Currently only client-side and server-side APIs are supported in Suppa
Steps to Add an API
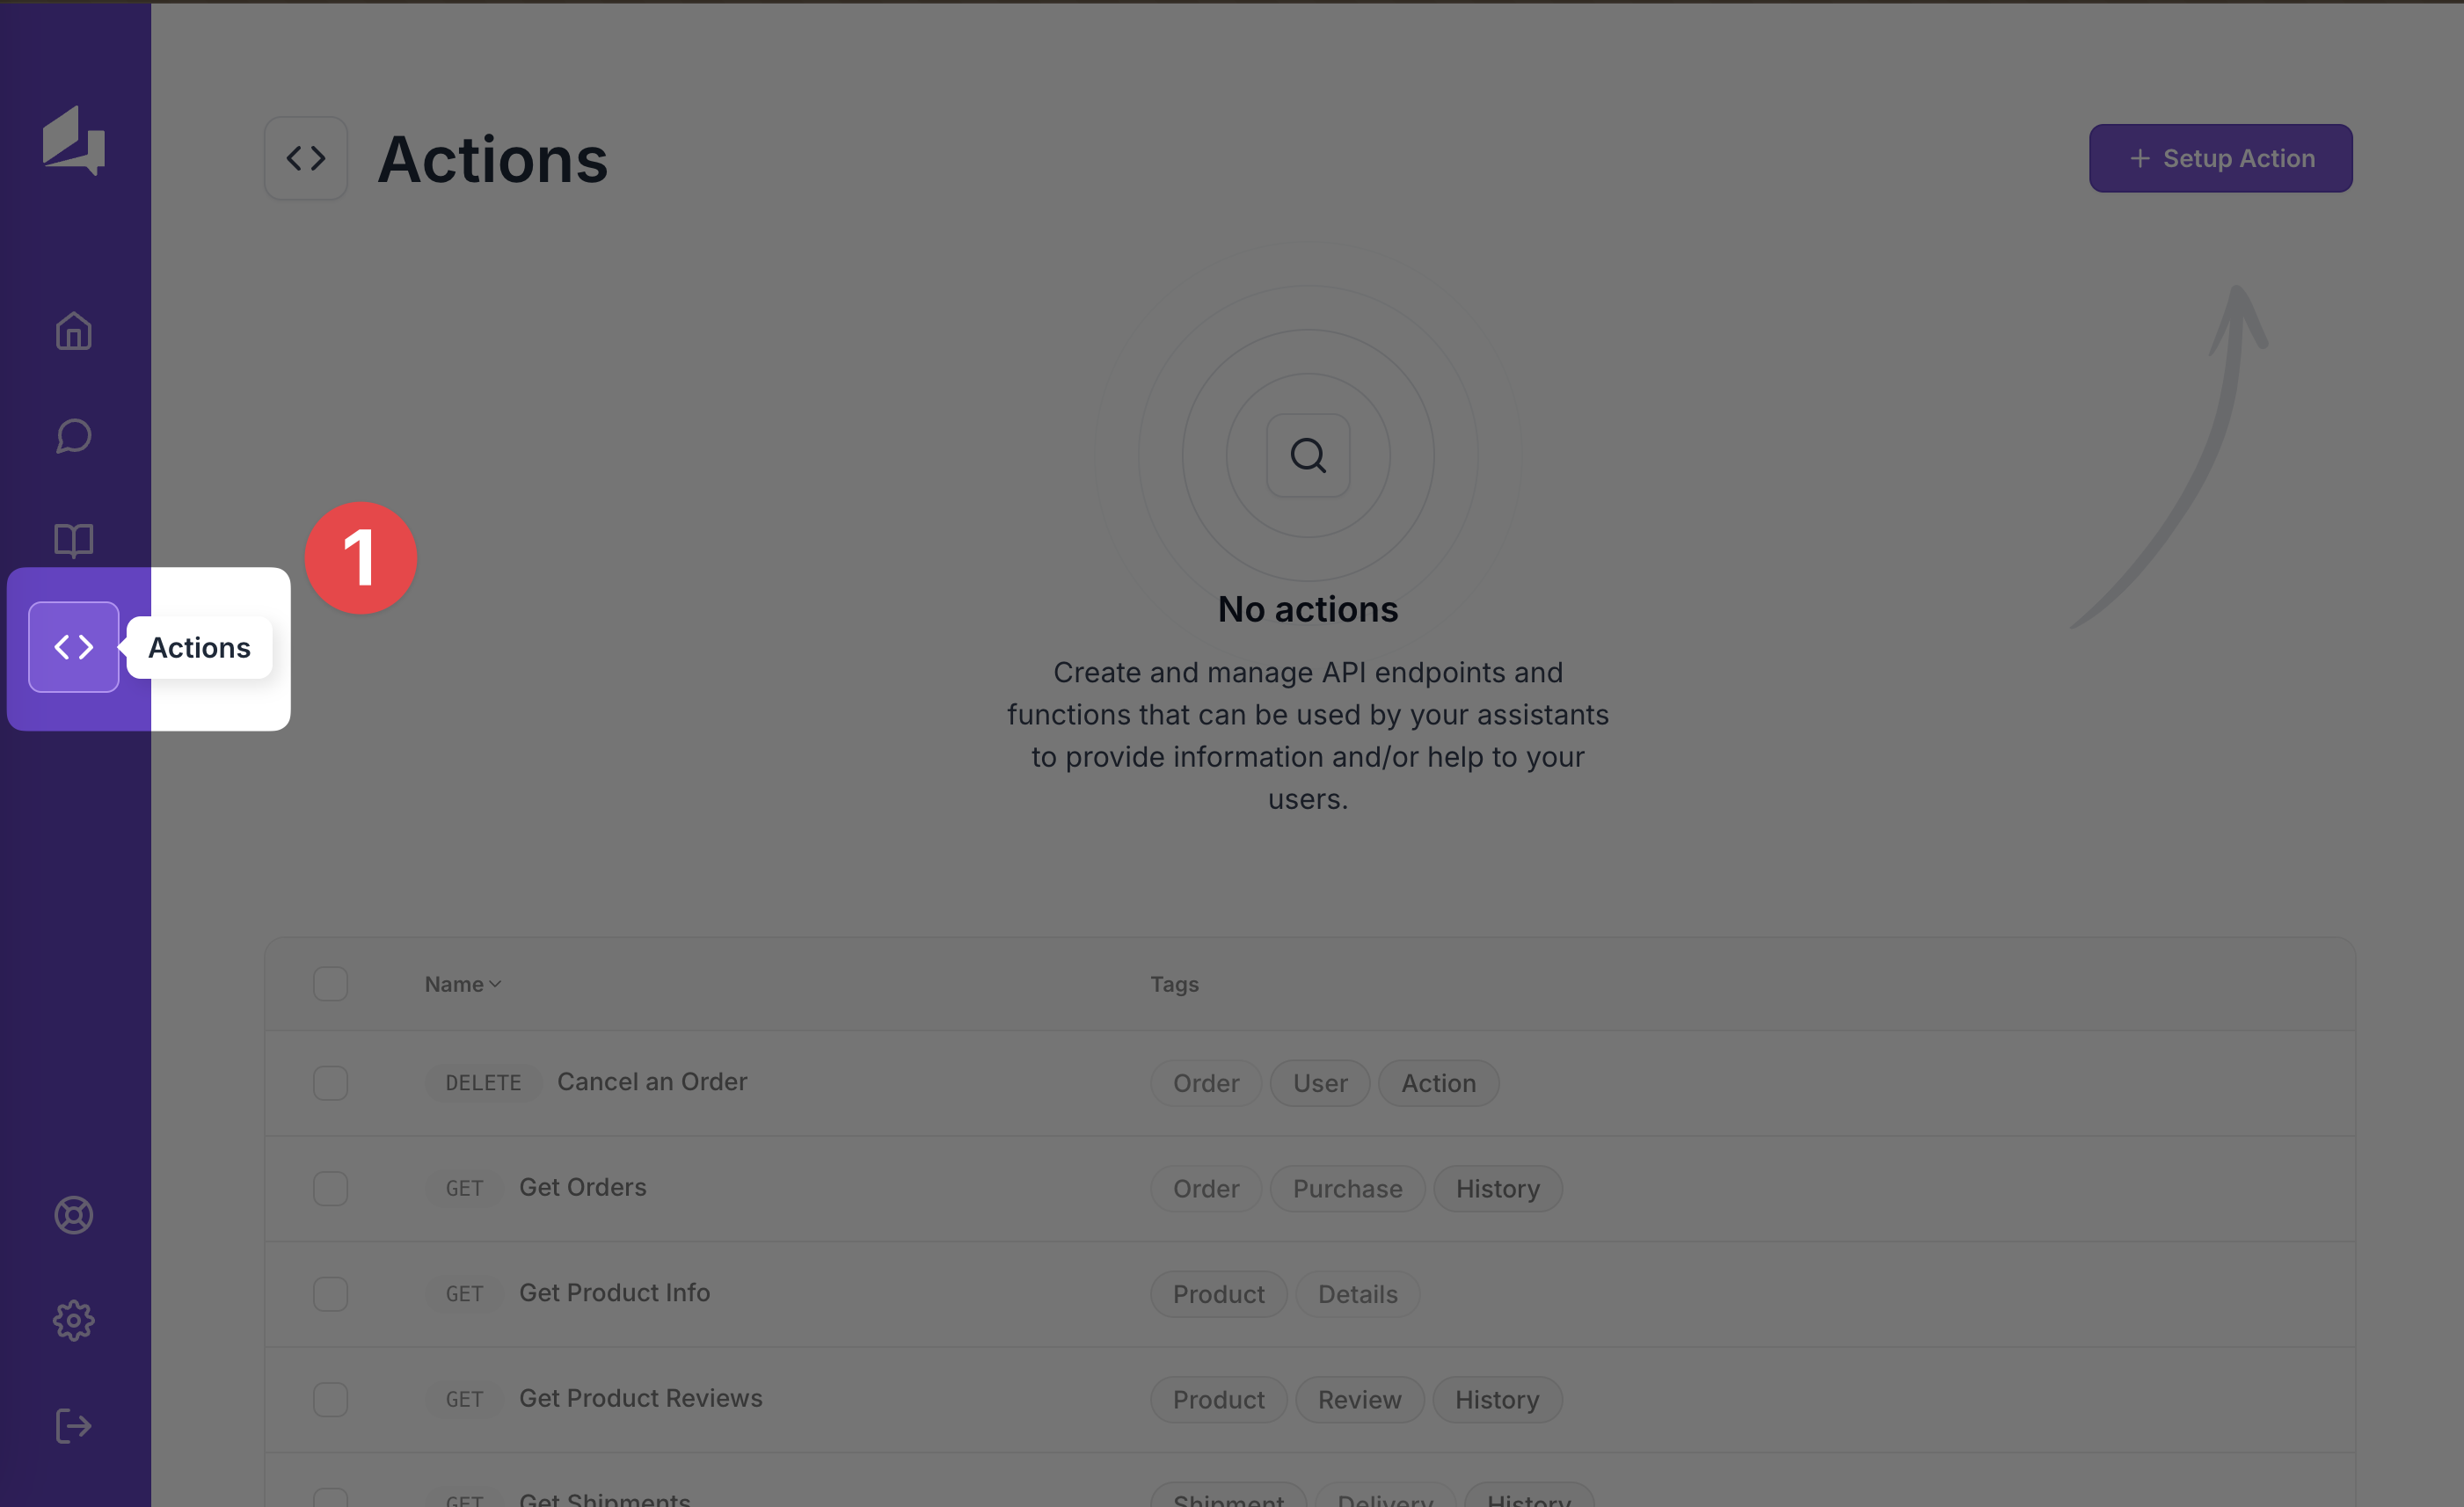
- Navigate to the Action management section in your Suppa dashboard.
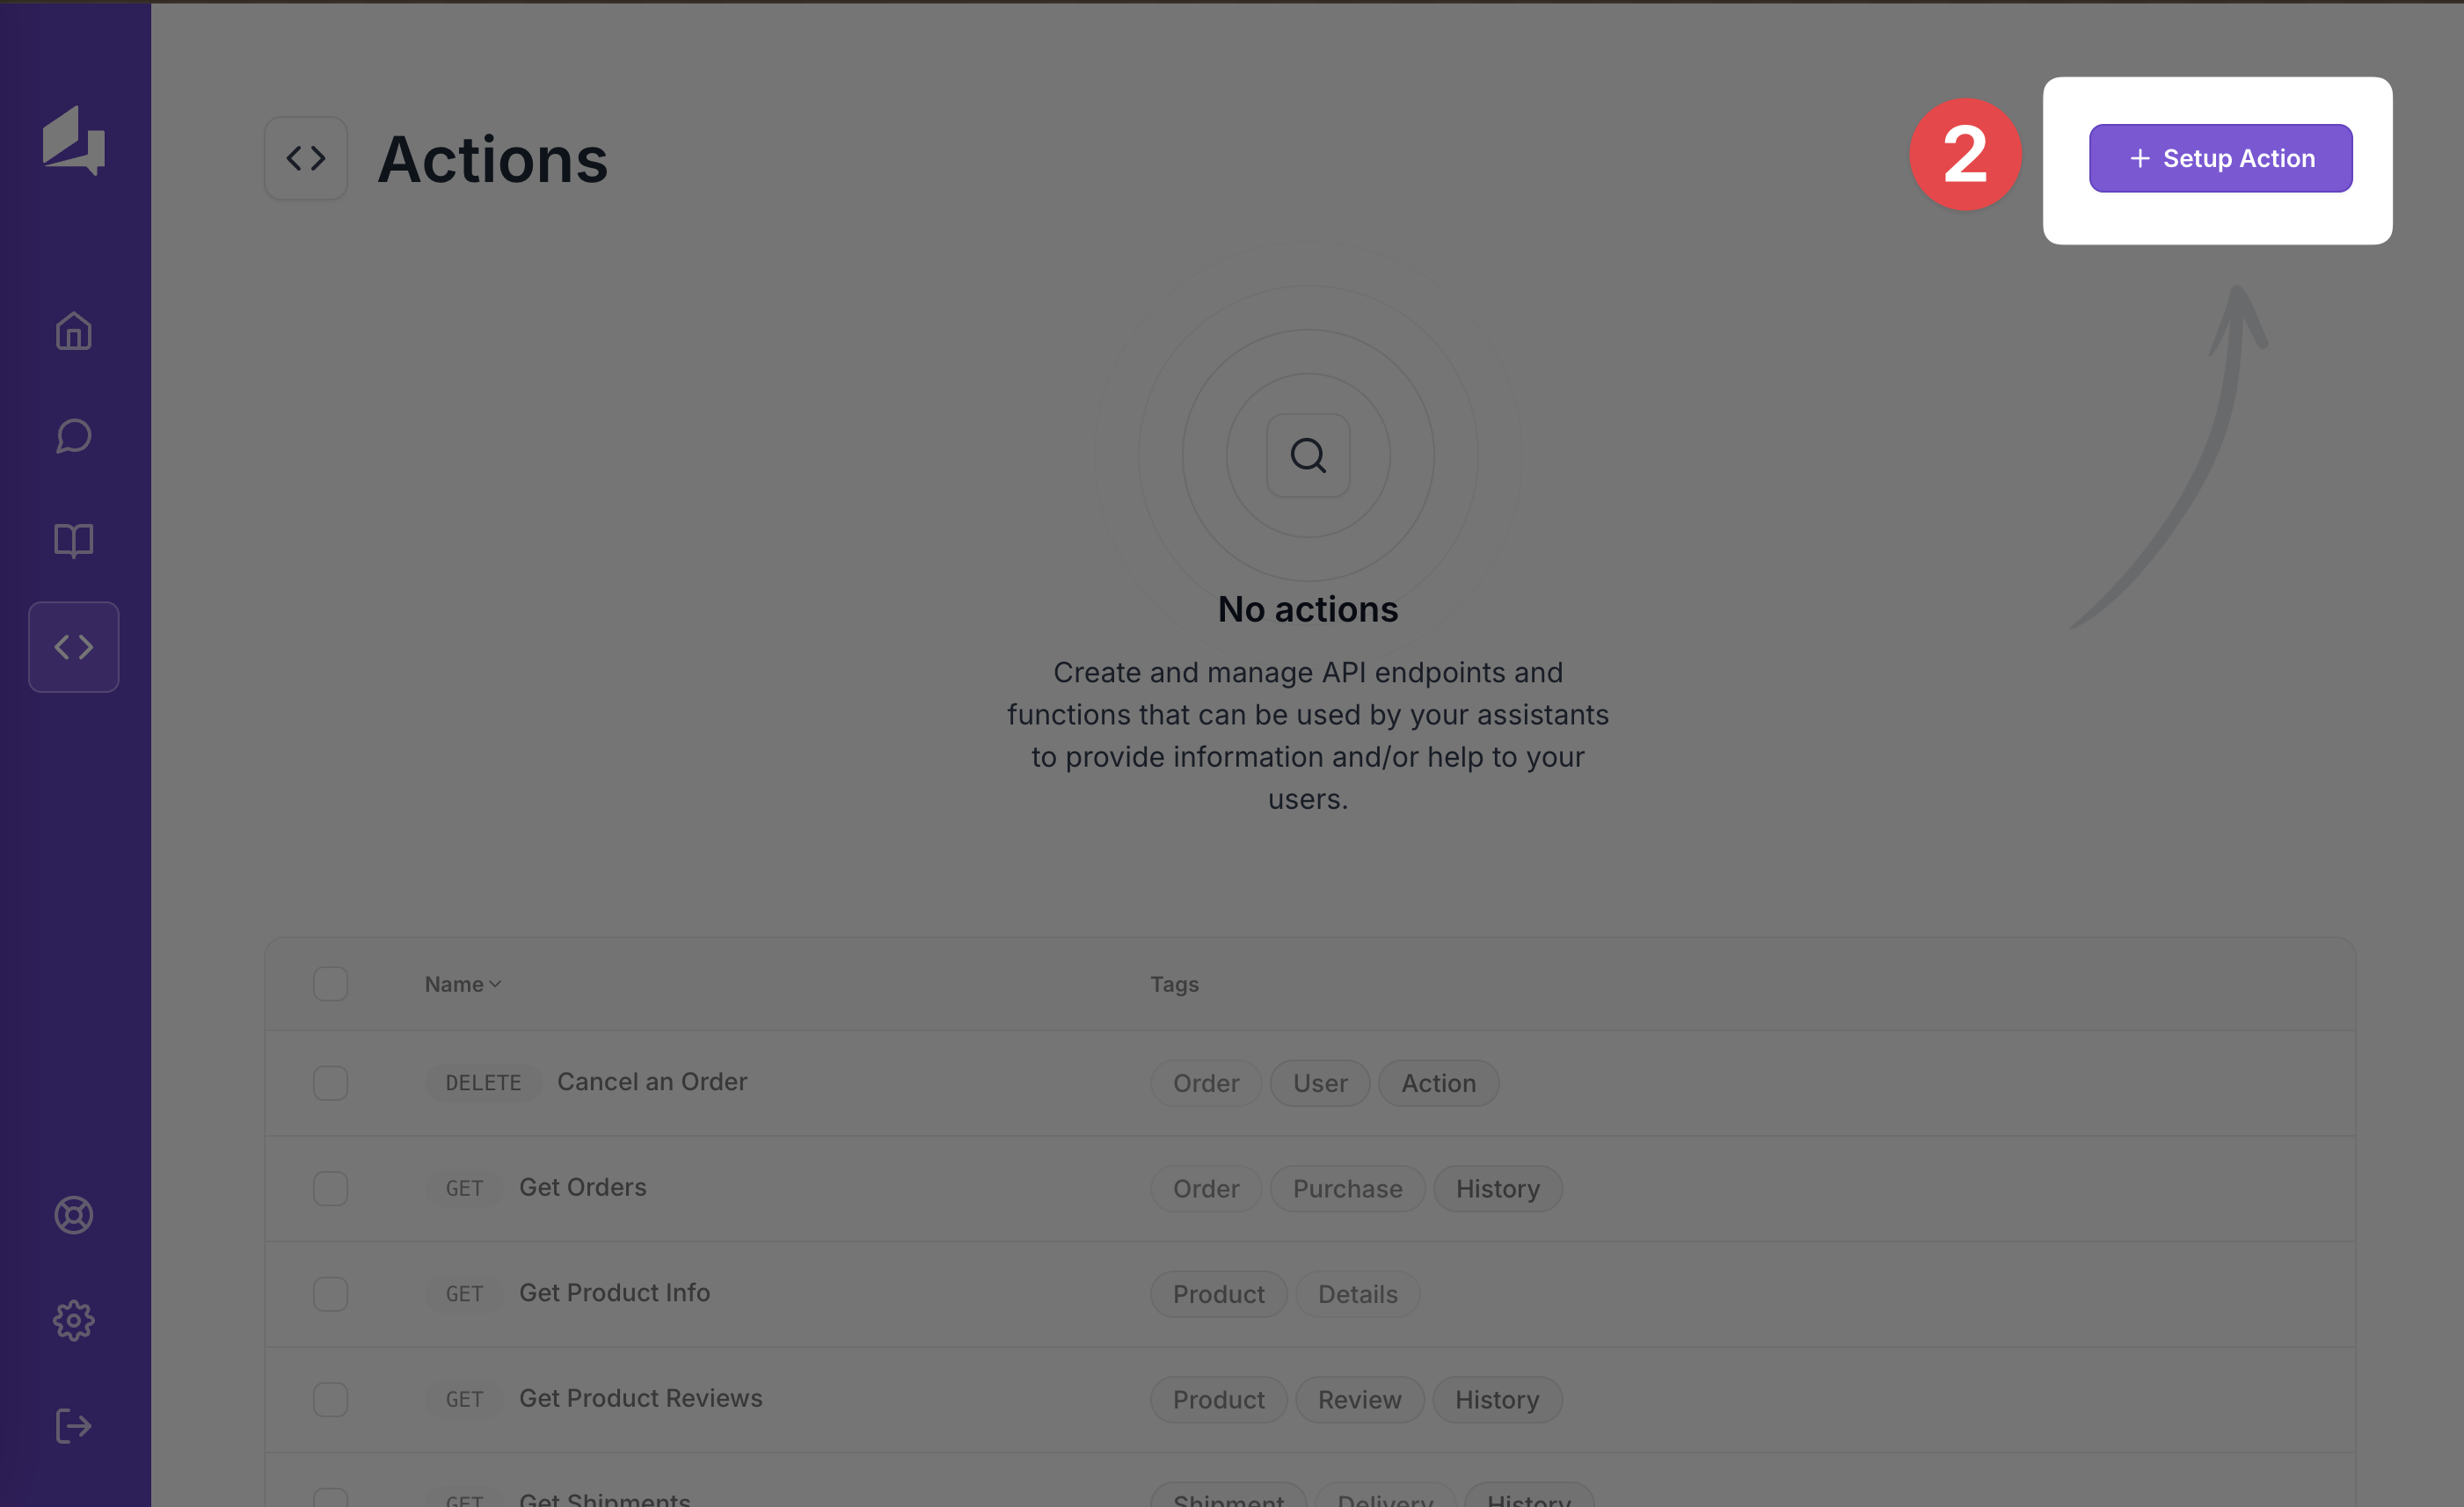
- Click on the "Setup API" button to open the setup modal.
- Fill in the following fields:
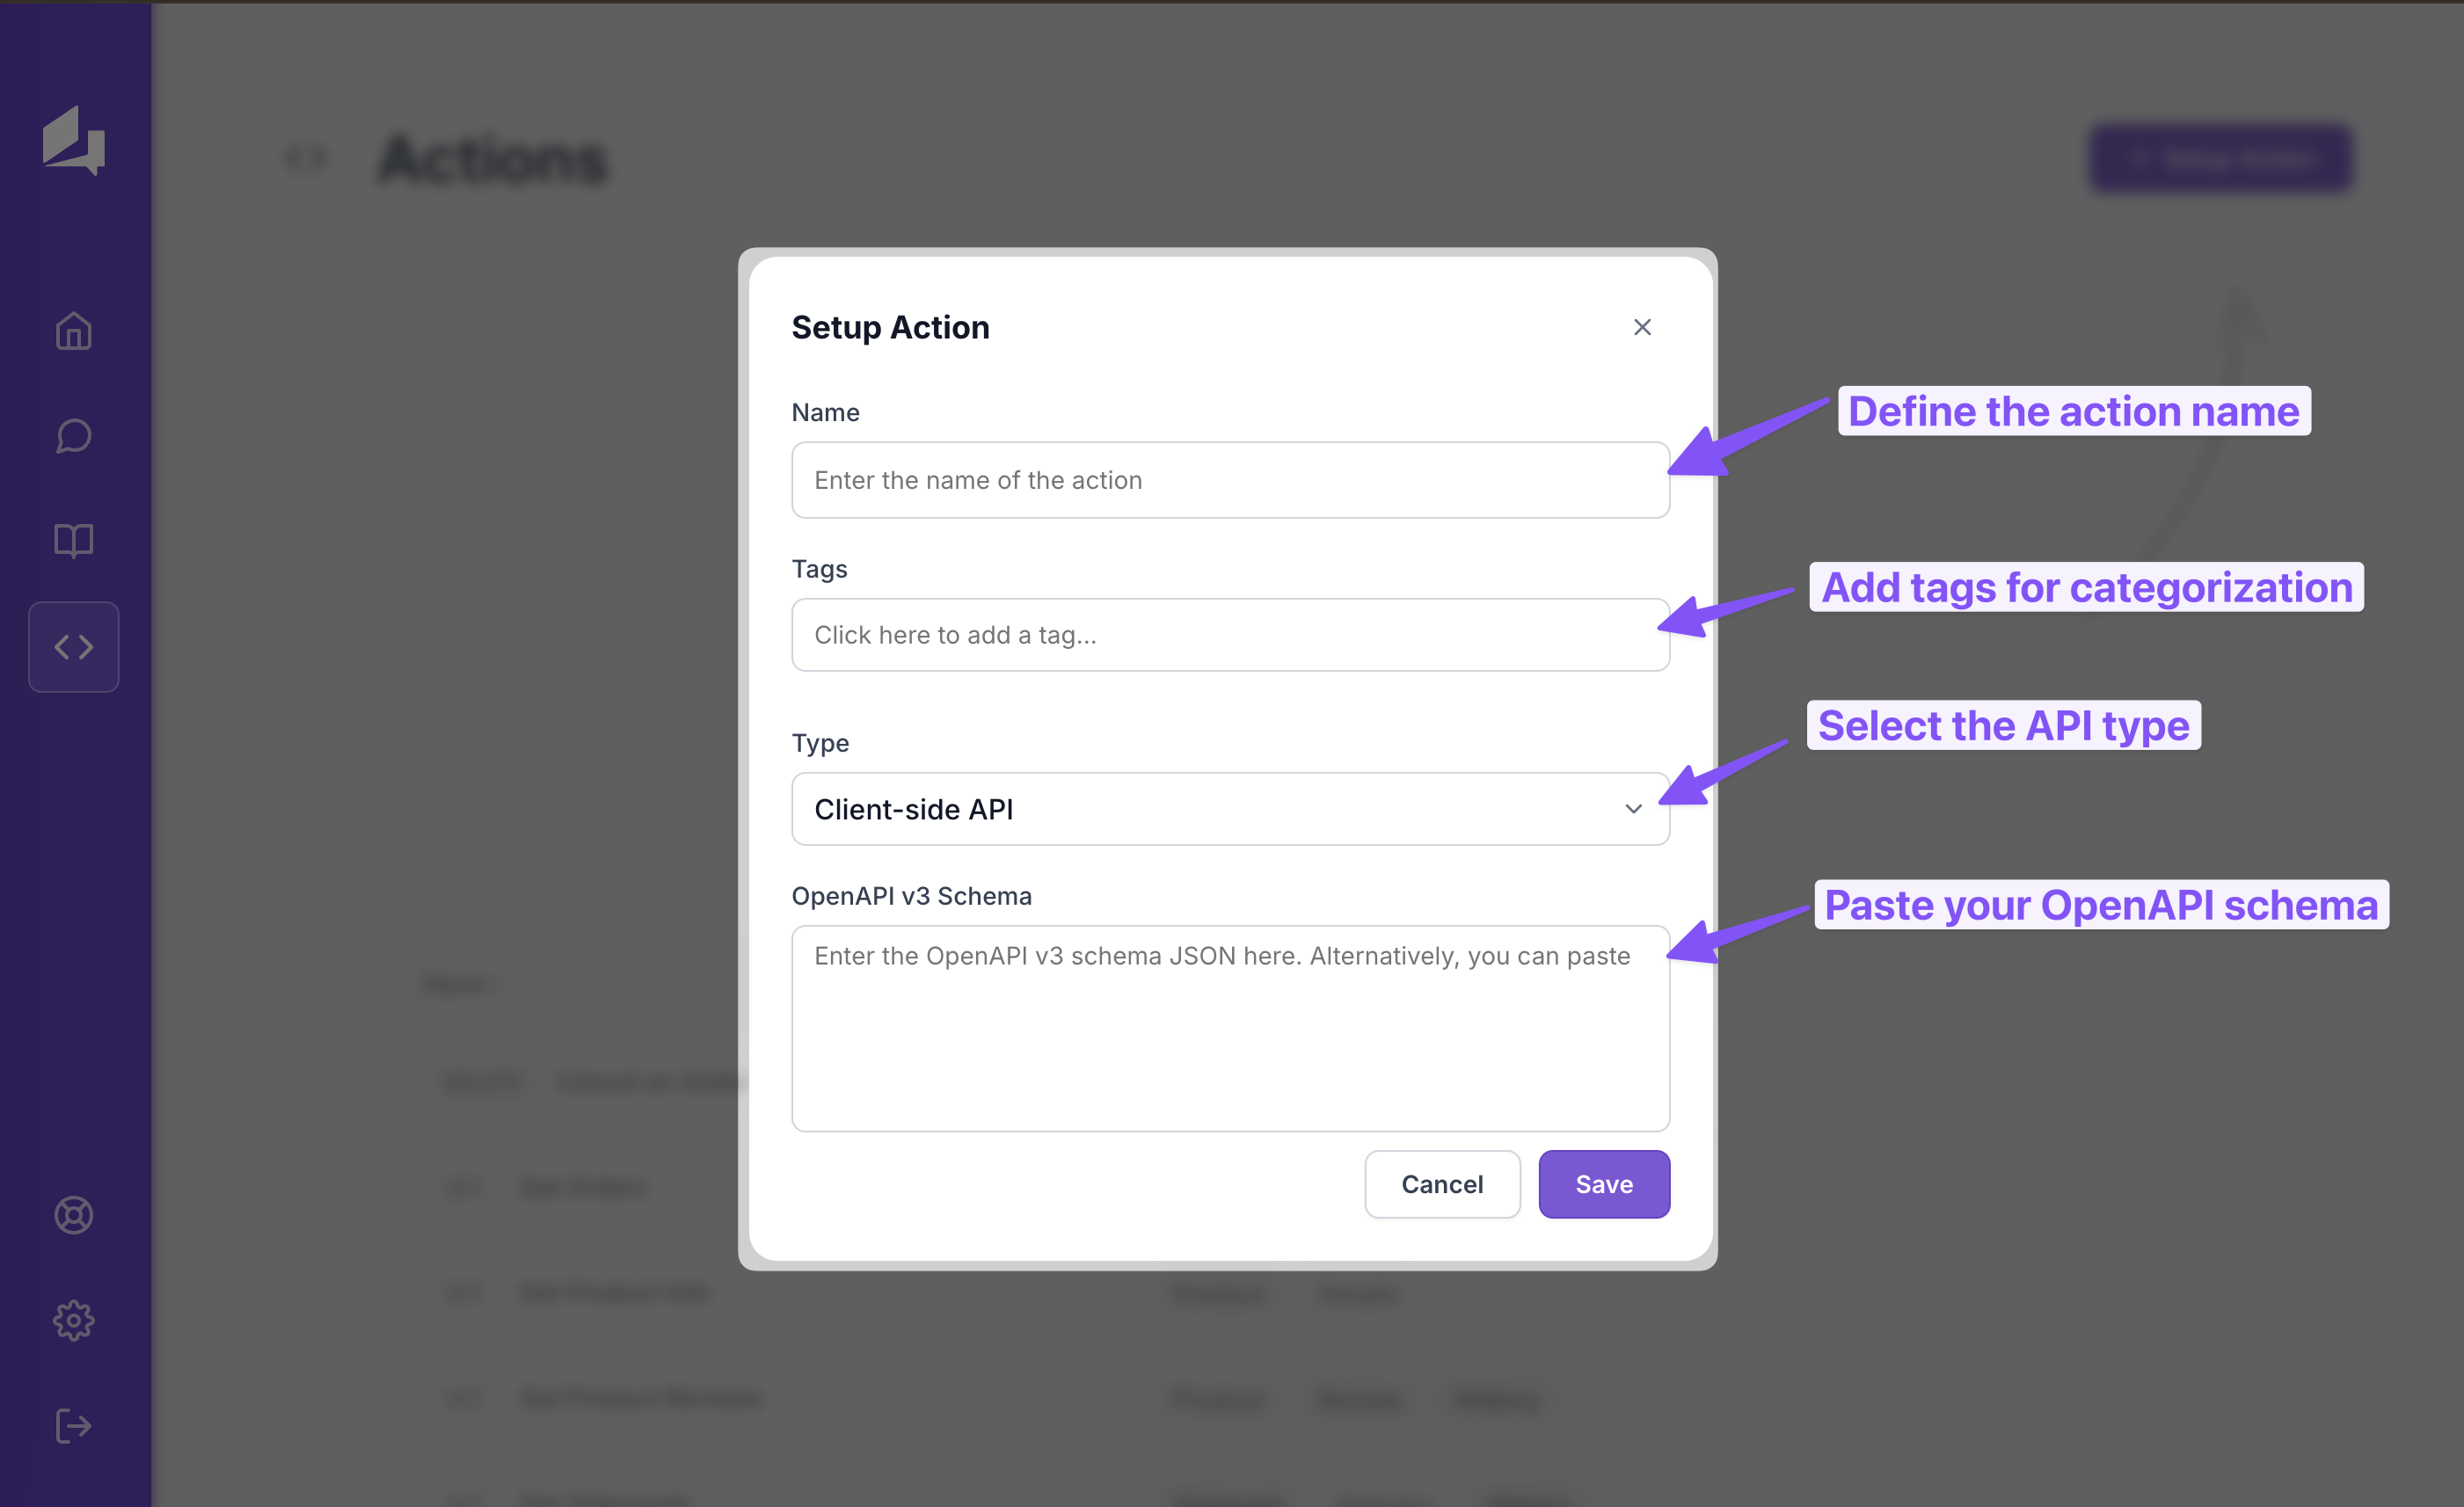
Field Descriptions
- Name: Enter a descriptive name for your API function. This should be clear and indicative of the API's purpose.
Ensure the name is unique and easily recognizable by the AI assisstant. Example: checkInventory, getWeather, createOrder
-
Tags: Add relevant tags to categorize and easily search for your API later. Click on the field to add multiple tags.
Suppa will automatically add the tags in the OpenAPI schema along.
-
Type: Select the appropriate type for your API.
API TypesClient-side API: Indicates that the API will be called from the client-side of your application, such as a web browser or mobile app.
Server-side API: Indicates that the API will be called from the server-side of your application, such as a backend server or cloud function.
-
OpenAPI v3 Schema: Enter the
OpenAPIJSON schema that defines the structure your API.
Sample OpenAPI Schema
When adding an API, you'll need to provide a OpenAPI schema for the request body which should follow OpenAPI specifications.
Here's an example of how you might define the request body schema for an API that gets weather information for a city:
{
  "openapi": "3.1.0",
  "info": {
    "title": "Simple Weather API",
    "version": "1.0.0"
  },
  "servers": [
    {
      "url": "https://api.weatherexample.com/v1"
    }
  ],
  "paths": {
    "/weather/{city}": {
      "get": {
        "summary": "Get weather for a city",
        "parameters": [
          {
            "name": "city",
            "in": "path",
            "required": true,
            "schema": {
              "type": "string"
            }
          }
        ],
        "responses": {
          "200": {
            "description": "Successful response",
            "content": {
              "application/json": {
                "schema": {
                  "$ref": "#/components/schemas/WeatherInfo"
                }
              }
            }
          }
        }
      }
    }
  },
  "components": {
    "schemas": {
      "WeatherInfo": {
        "type": "object",
        "properties": {
          "temperature": {
            "type": "number"
          },
          "description": {
            "type": "string"
          }
        }
      }
    }
  }
}
For better readability, you can use a tool like Swagger Editor to visualize and edit your OpenAPI schema.
Petstore example from Swagger is always a good starting point to understand the OpenAPI schema.
Demo Video
Here is a video that shows how to add an item to the knowledgebase.
Best Practices for Adding an API Action
- Use clear, descriptive names for your APIs
- Use specific, relevant tags to organize your APIs
- Ensure your OpenAPI schema is correct
- Test your API thoroughly after adding it to Suppa
By following these steps and best practices, you can successfully integrate custom APIs into your Suppa digital assistant, enhancing its capabilities to provide more tailored and efficient responses to user queries.