Introduction to Canvas
Canvas is a powerful visual programming interface that allows you to create and manipulate nodes to build complex flows for your conversational AI projects.
This guide provides an overview of the Canvas, how to work with nodes, and tips for creating effective workflows.
Overview of the UI
The Canvas provides a drag-and-drop interface where you can add, connect, and configure nodes to create custom conversational flows.
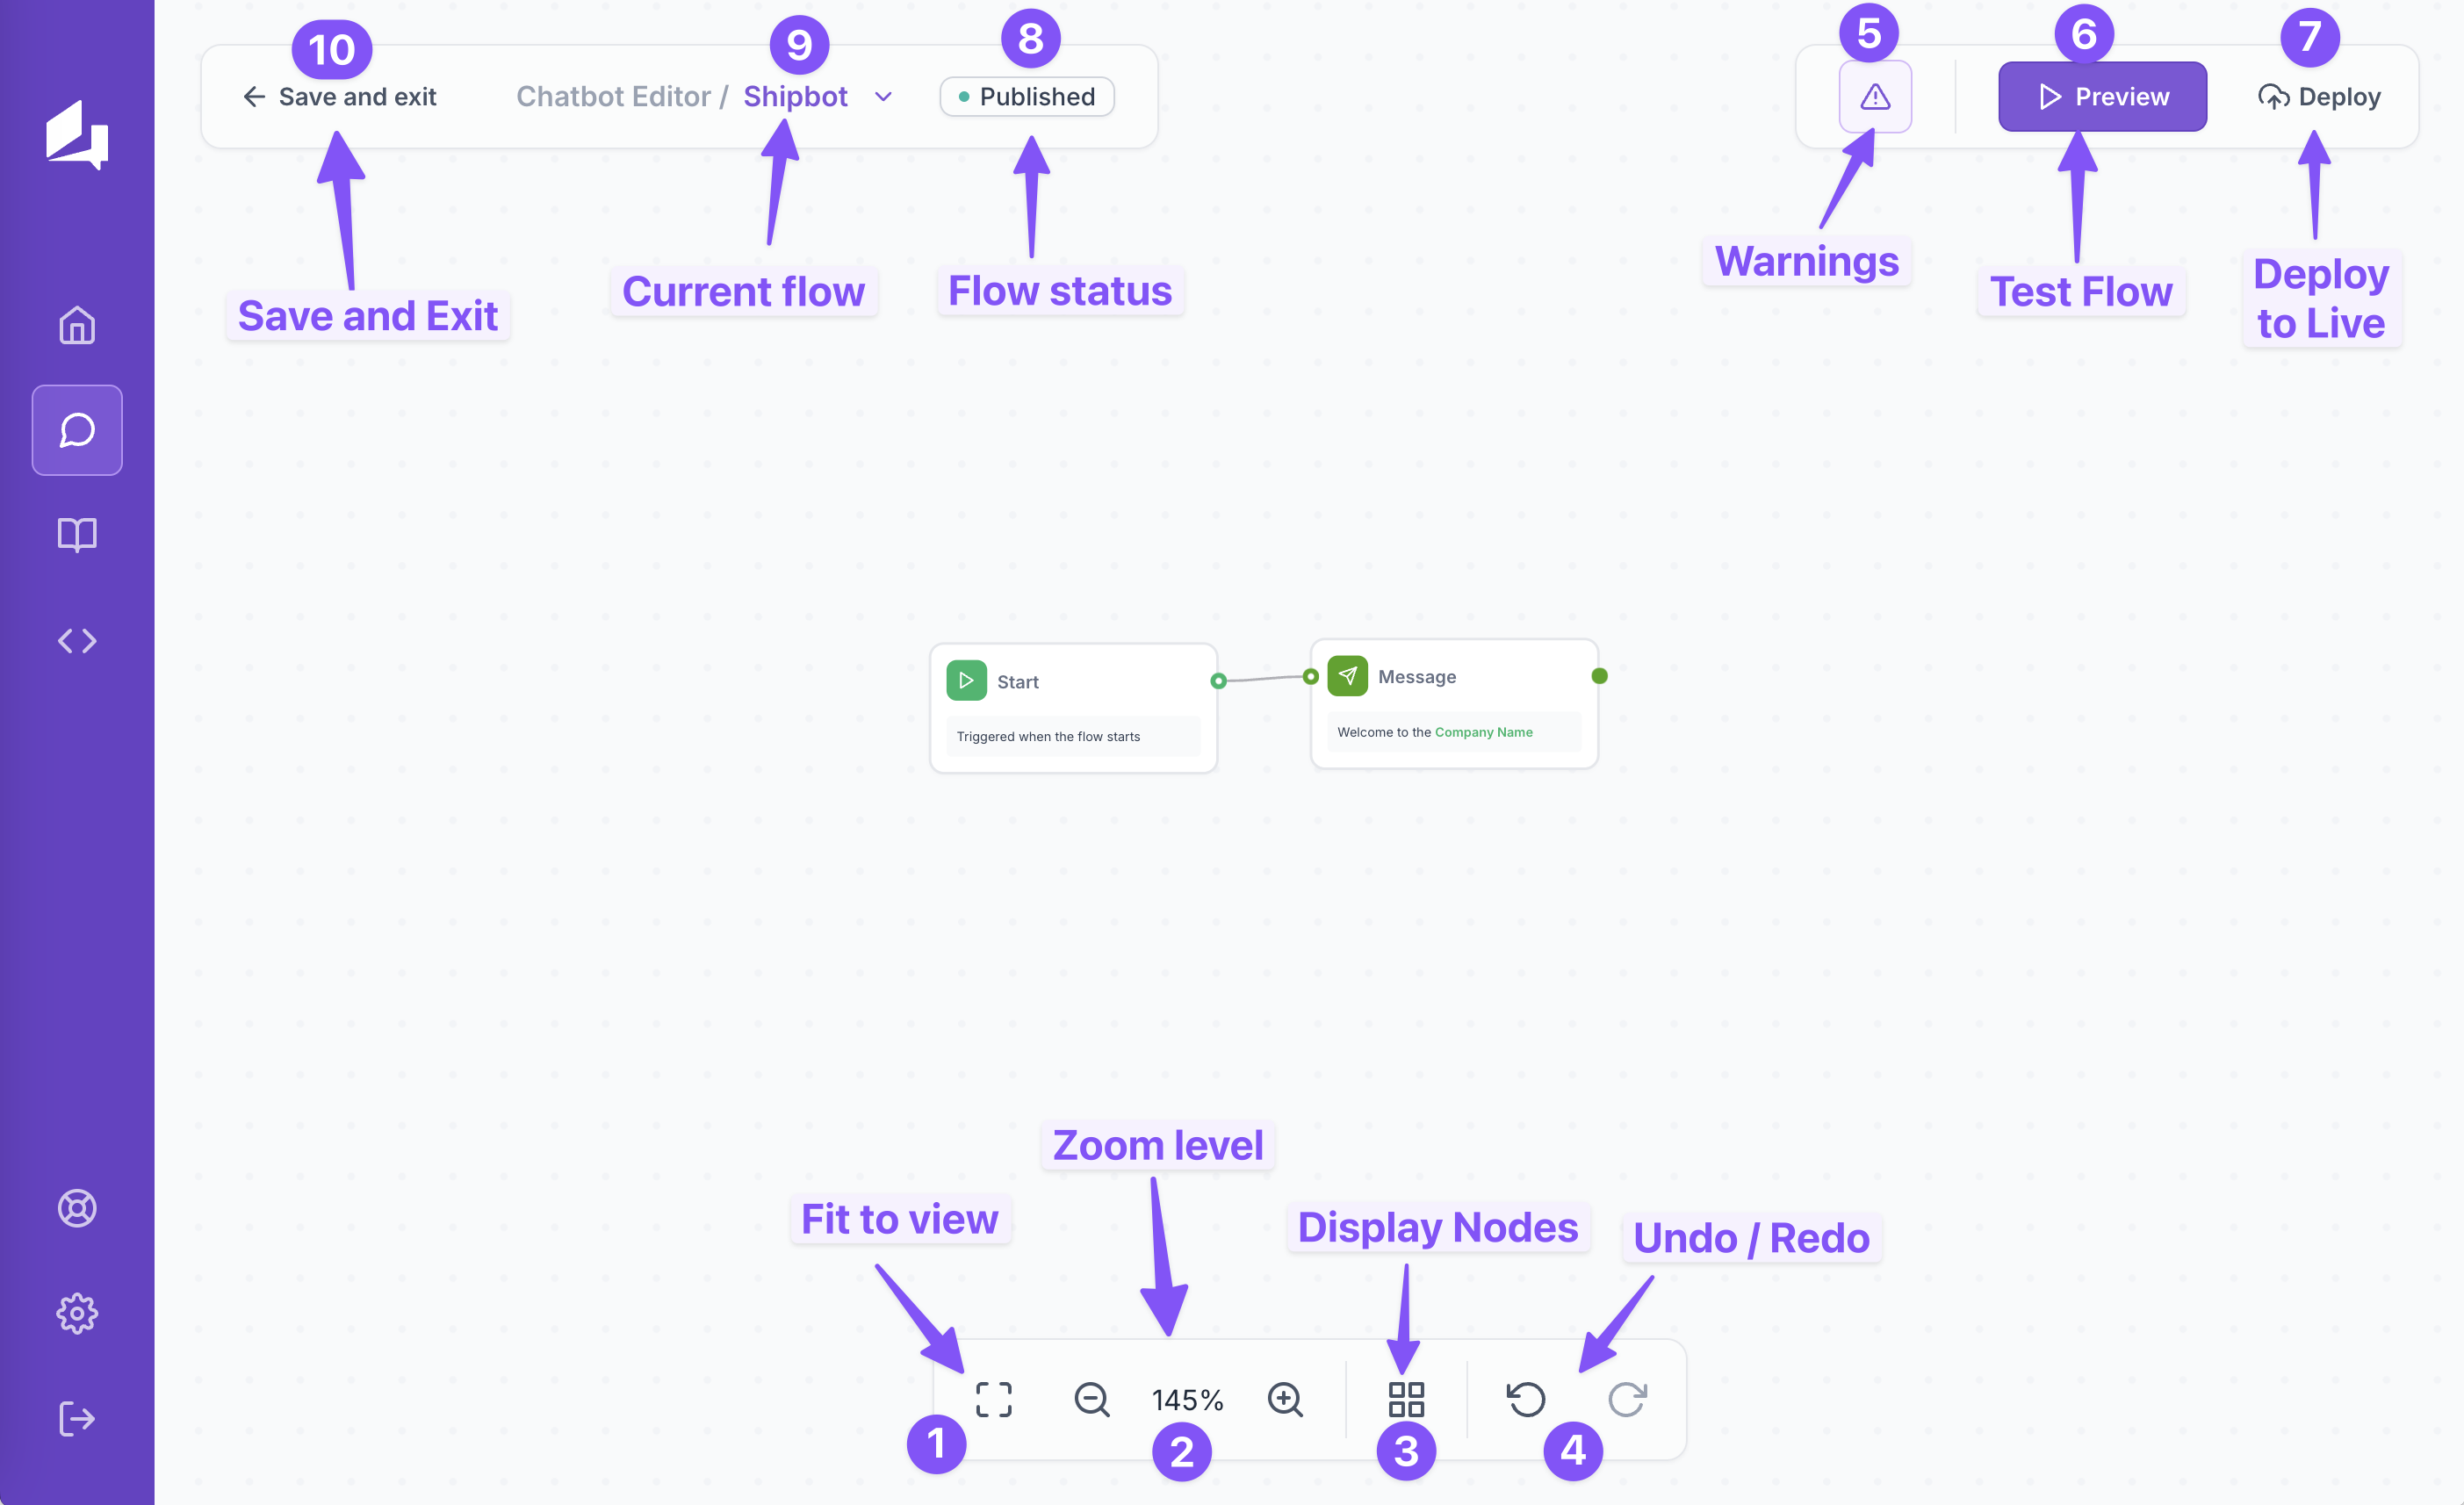
- Fit to View: Adjusts the canvas to fit all nodes in the visible area.
- Zoom Level: Controls the zoom level of the canvas (e.g., 145%).
- Display Nodes: Toggles the node sidebar on and off.
- Undo/Redo: Allows you to undo or redo recent actions.
- Warnings Checklits : Shows any warnings and errors related to your current flow.
- Preview : Allows you to test your flow before deployment.
- Deploy : Deploys your flow to make it live.
- Flow Status : Indicates whether the flow is published or in draft.
- Current Flow : Displays the name of the current flow you're working on.
- Save and Exit : Save your current work and exit the editor.
Working with Nodes
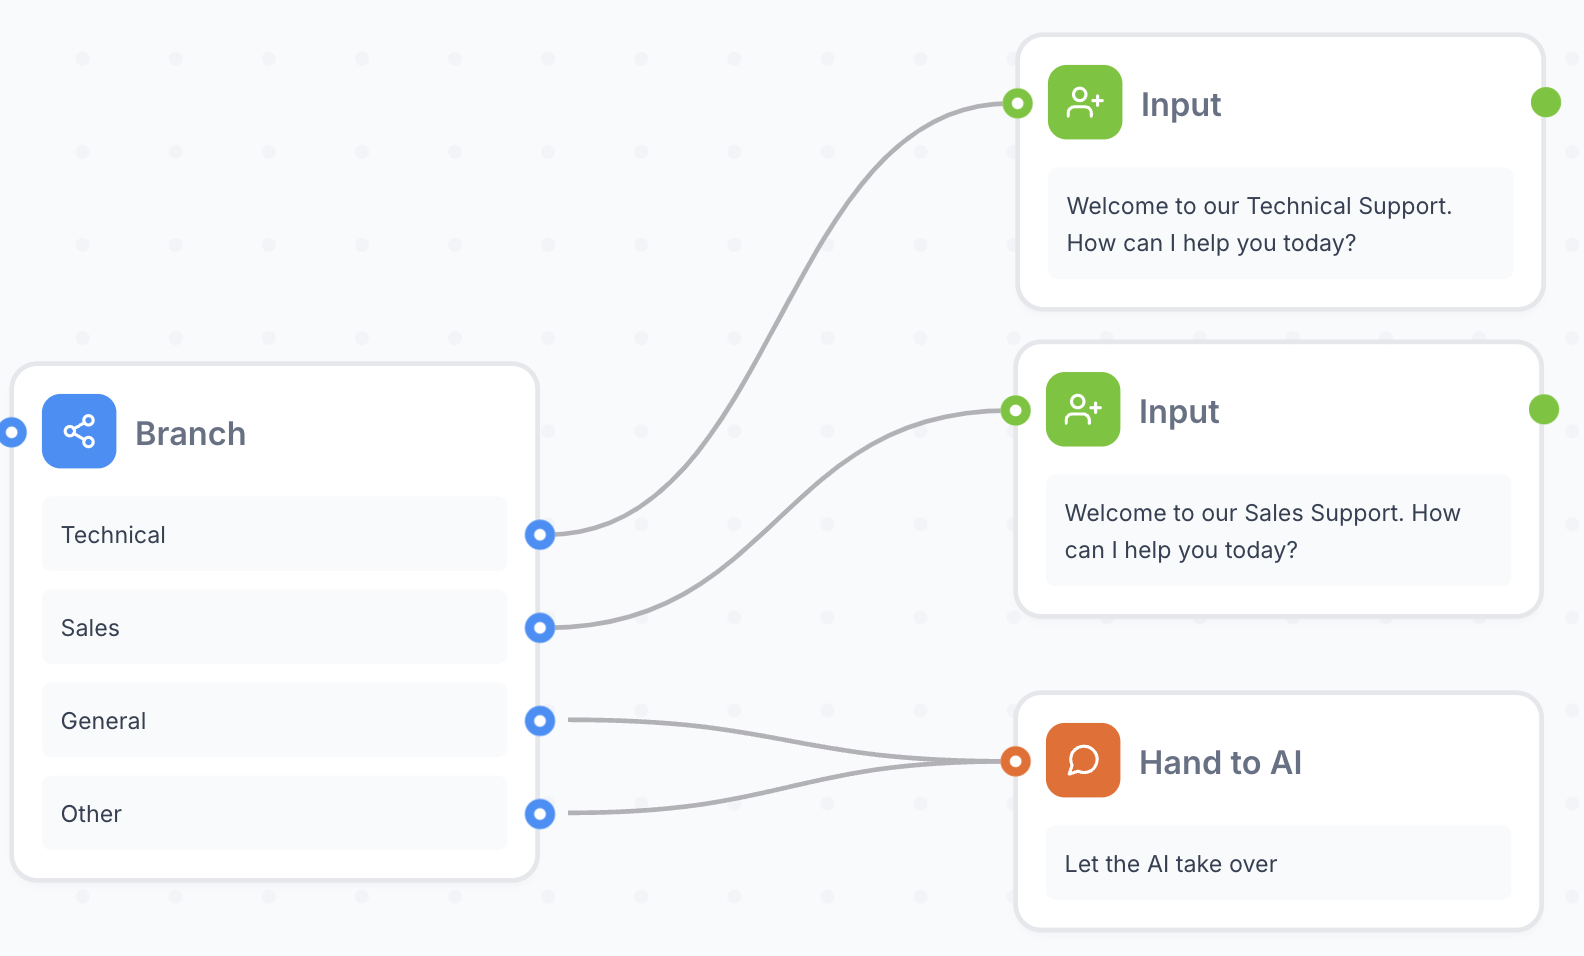
Nodes are the building blocks of your conversational flow. Each node represents a specific action or decision point in the conversation.
Each node has input/output ports that allow you to connect nodes together to create a flow. Some of them only have input ports, output ports, or both.
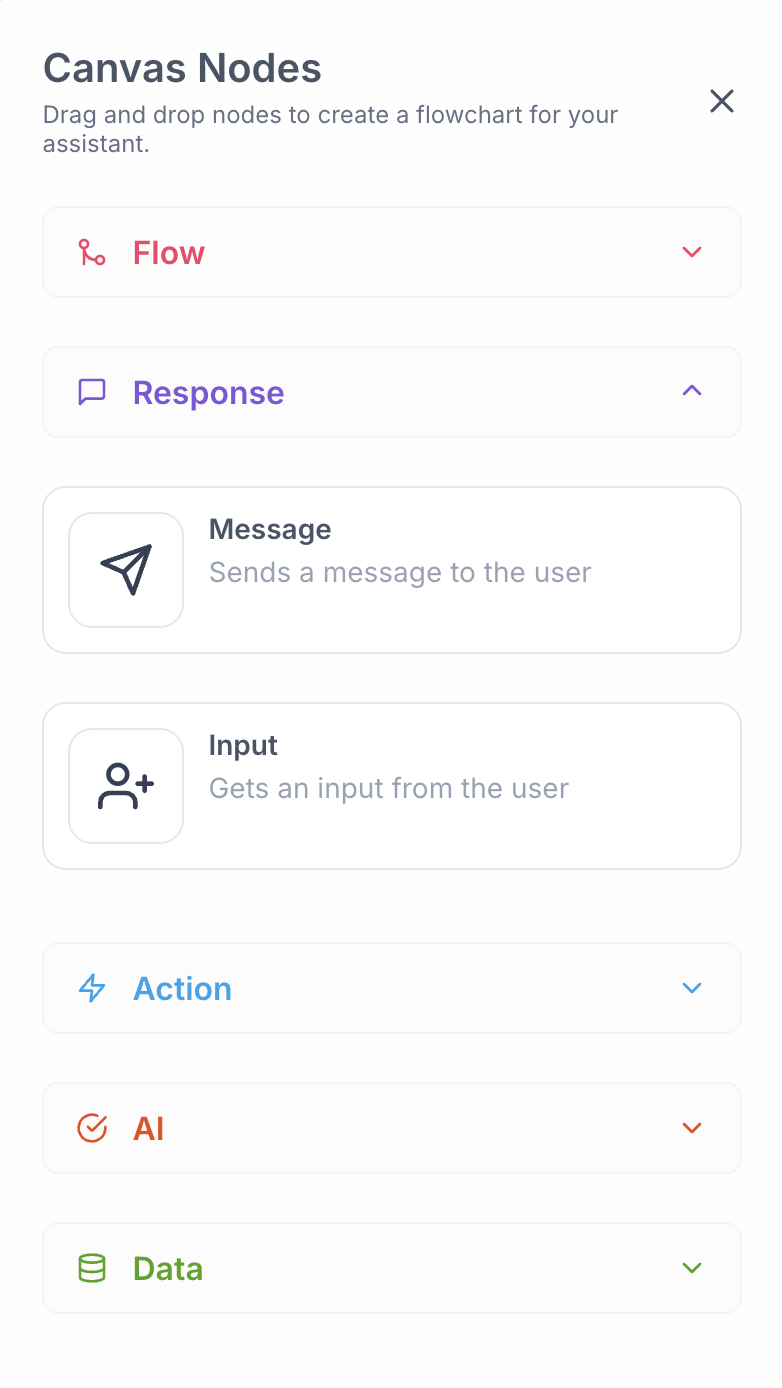
There are several categories of nodes in Canvas and you can find them in the sidebar on the right side of the screen.
Most of the nodes have additional settings that you can configure to customize their behavior. These settings can be accessed by clicking on the node. Detailed information about each node can be found in the documentation.
Adding Nodes
To add a new node to your flow, click on the desired node in the sidebar and drag it onto the canvas.
Connecting Nodes
To connect two nodes together, click and drag from the output port of one node to the input port of another node. You can also start dragging from the input port to the output port.
Only one connection can be made from an output port, but you can make multiple connections to the input port.
Moving Nodes
To move a node, click and drag it to the desired location on the canvas.
You can also select multiple nodes by clicking and dragging a selection box around them.
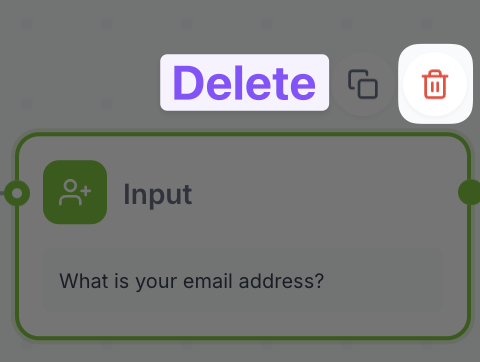
Deleting a Node
To delete a node, click on the node and select the delete option. You can also use the delete key on your keyboard to remove a selected node.
Deleting a node removes it and all its connections from the canvas.
You can also delete multiple nodes by selecting them and pressing the Delete or Backspace key on your keyboard.
Duplicating a Node
To duplicate a node, click on the node and select the duplicate option. A copy of the node will be created with the exact same configuration.
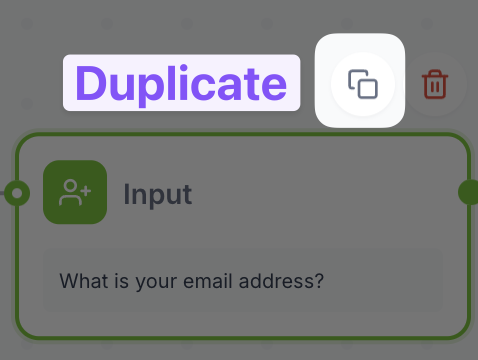
Here is how the duplication works:
When you duplicate a node that uses variables, the variables will be duplicated as well. However, since the incoming connections are not duplicated, the variables may be missing values initially.
To use them again, make sure you connect the duplicated node to the appropriate nodes that provide the variable values. The variables will then be populated with the correct values again.
Deleting a Connection
To delete a connection between two nodes, click on the connection line and press Delete or Backspace on your keyboard.
You can also delete multiple connections by selecting them by holding Command or Control buttons and pressing the Delete or Backspace key on your keyboard.
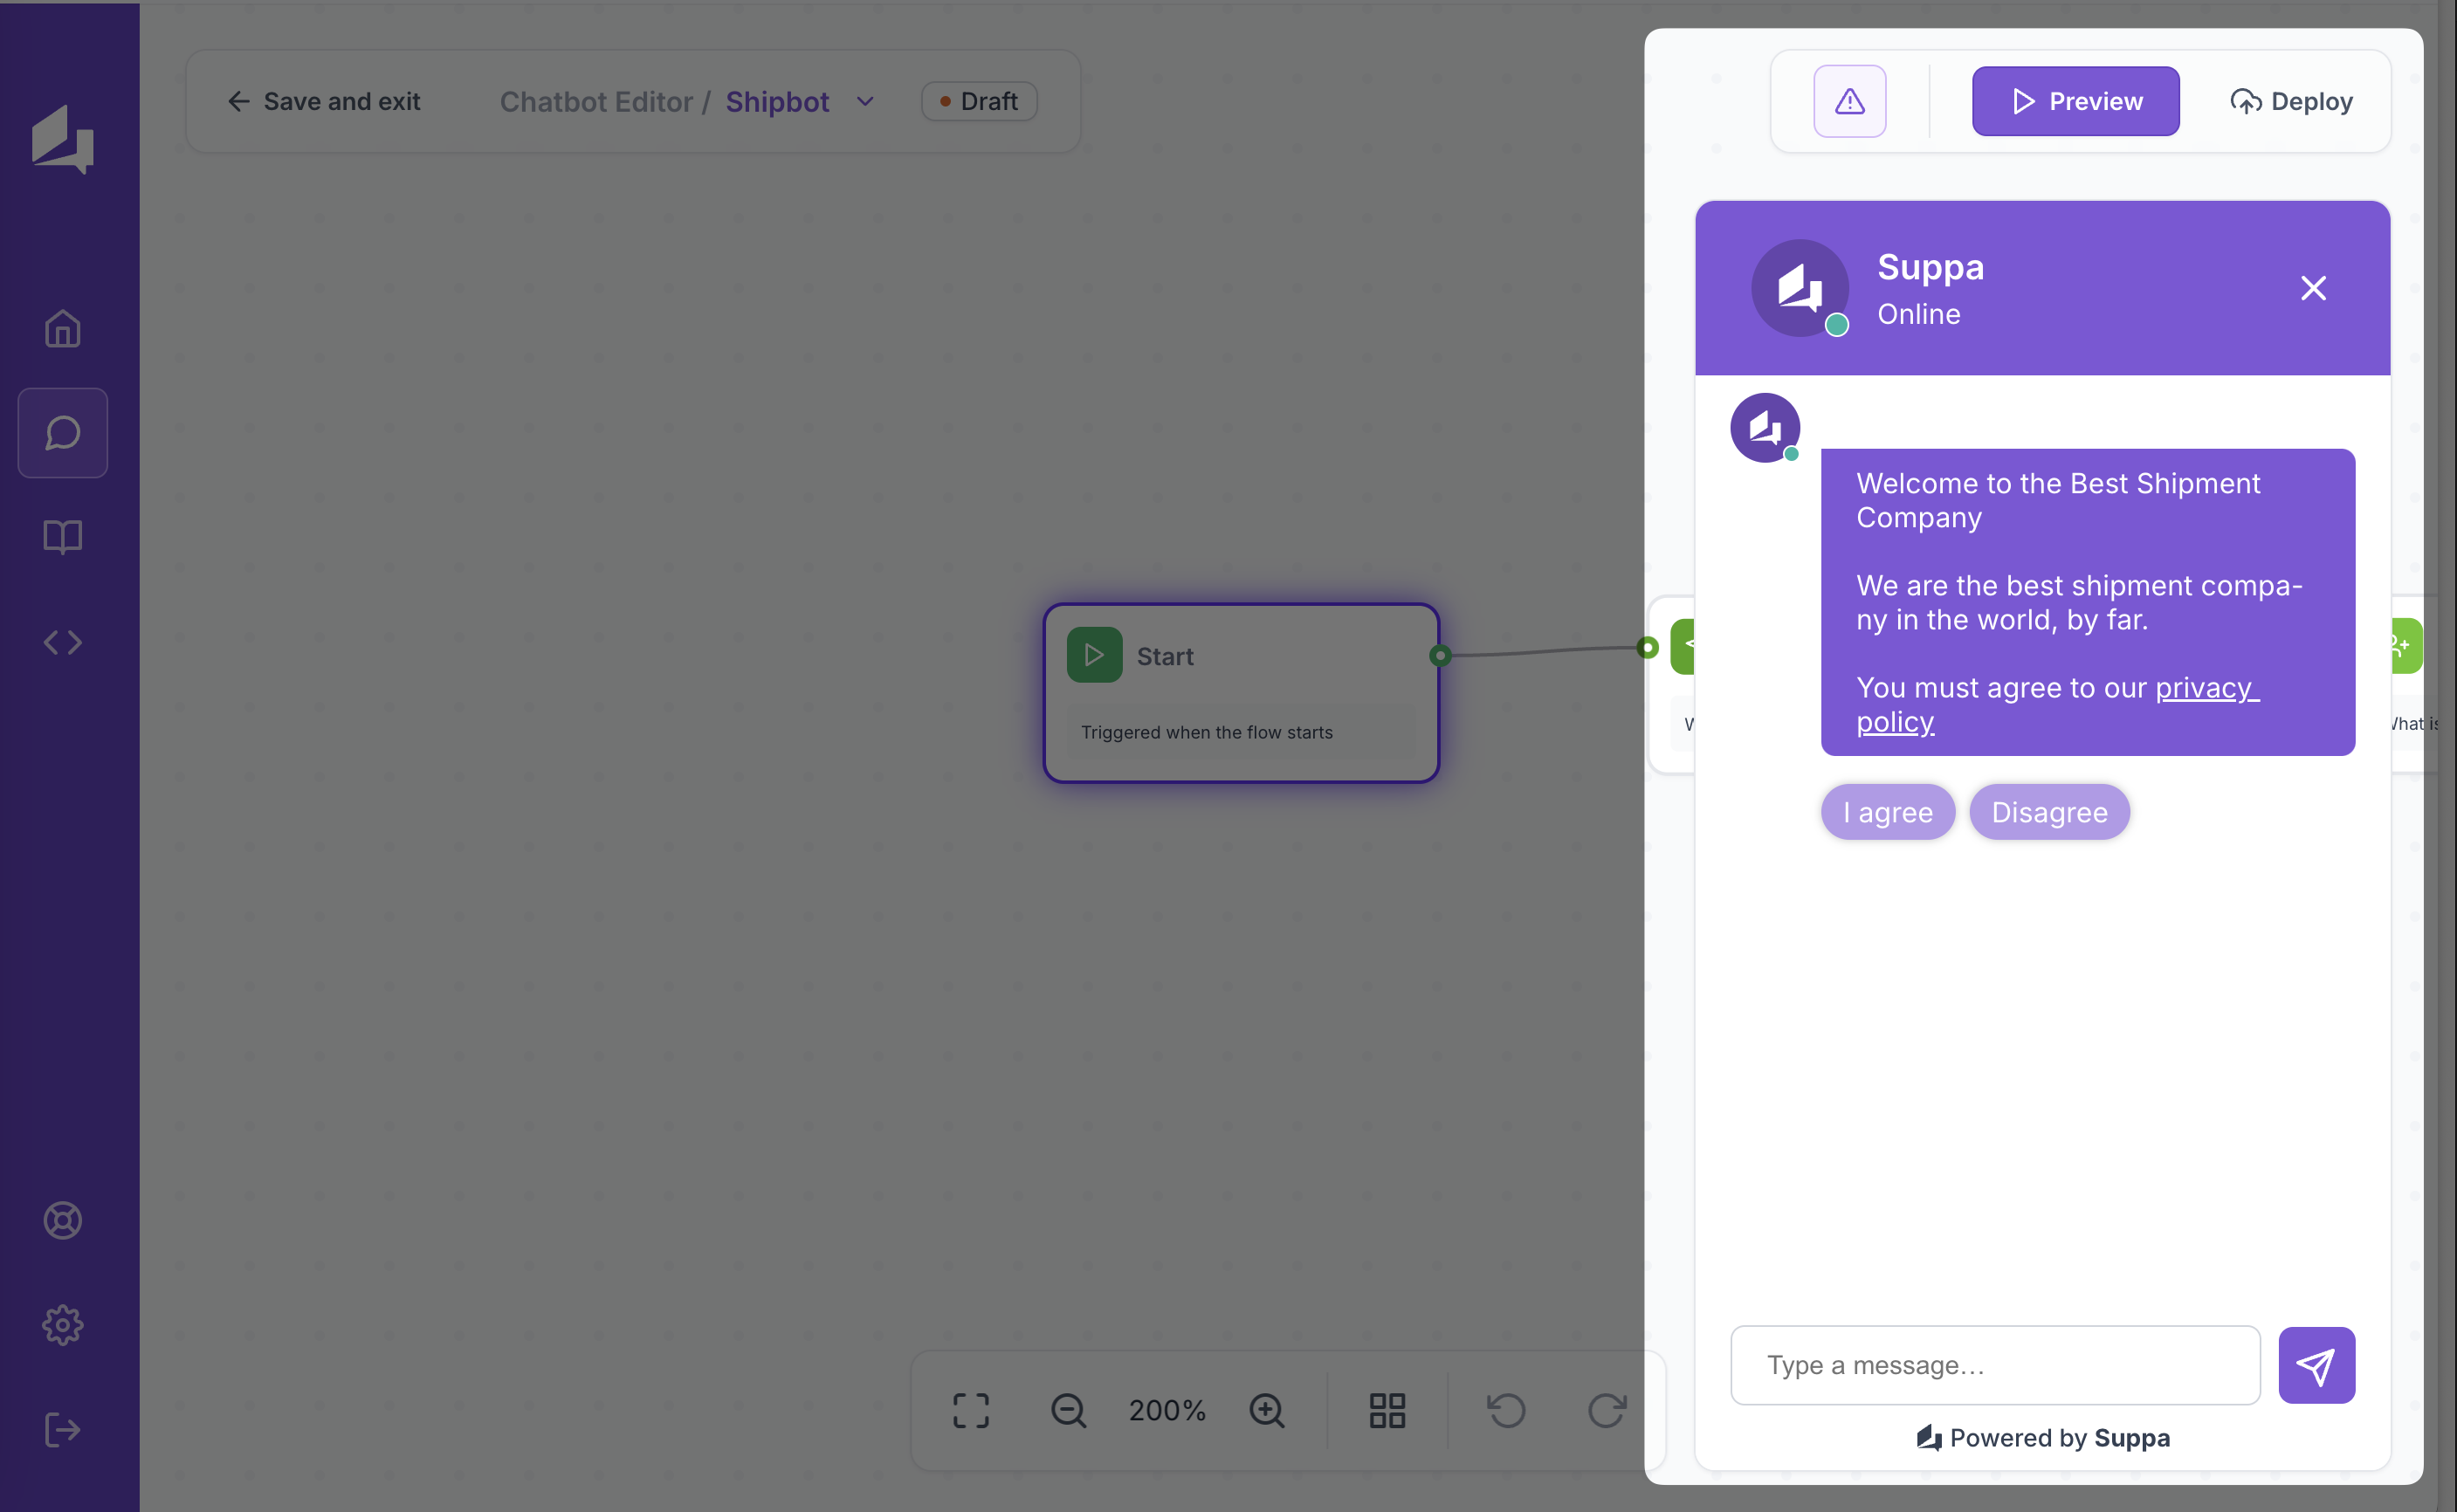
Preview
Once you have completed your flow, you can preview it to see how it will behave in a real conversation. The preview feature allows you to test your flow before deploying it to your users.
To preview your flow, click on the "Preview" button in the top right corner of the canvas. This will open a new window where you can interact with your flow as if you were a user.
Due to the CORS policy, the preview option will not work if your flow makes external API calls. You can still test the flow by deploying it and interacting with it in a live environment.
Deployment
When you are ready to make your flow live, click on the Deploy button in the top right corner of the canvas. This will publish your flow and make it available to your users.
You can only deploy a flow if there are no errors in your flow. Flows with warnings can still be deployed, but it is recommended to resolve any issues before deployment.
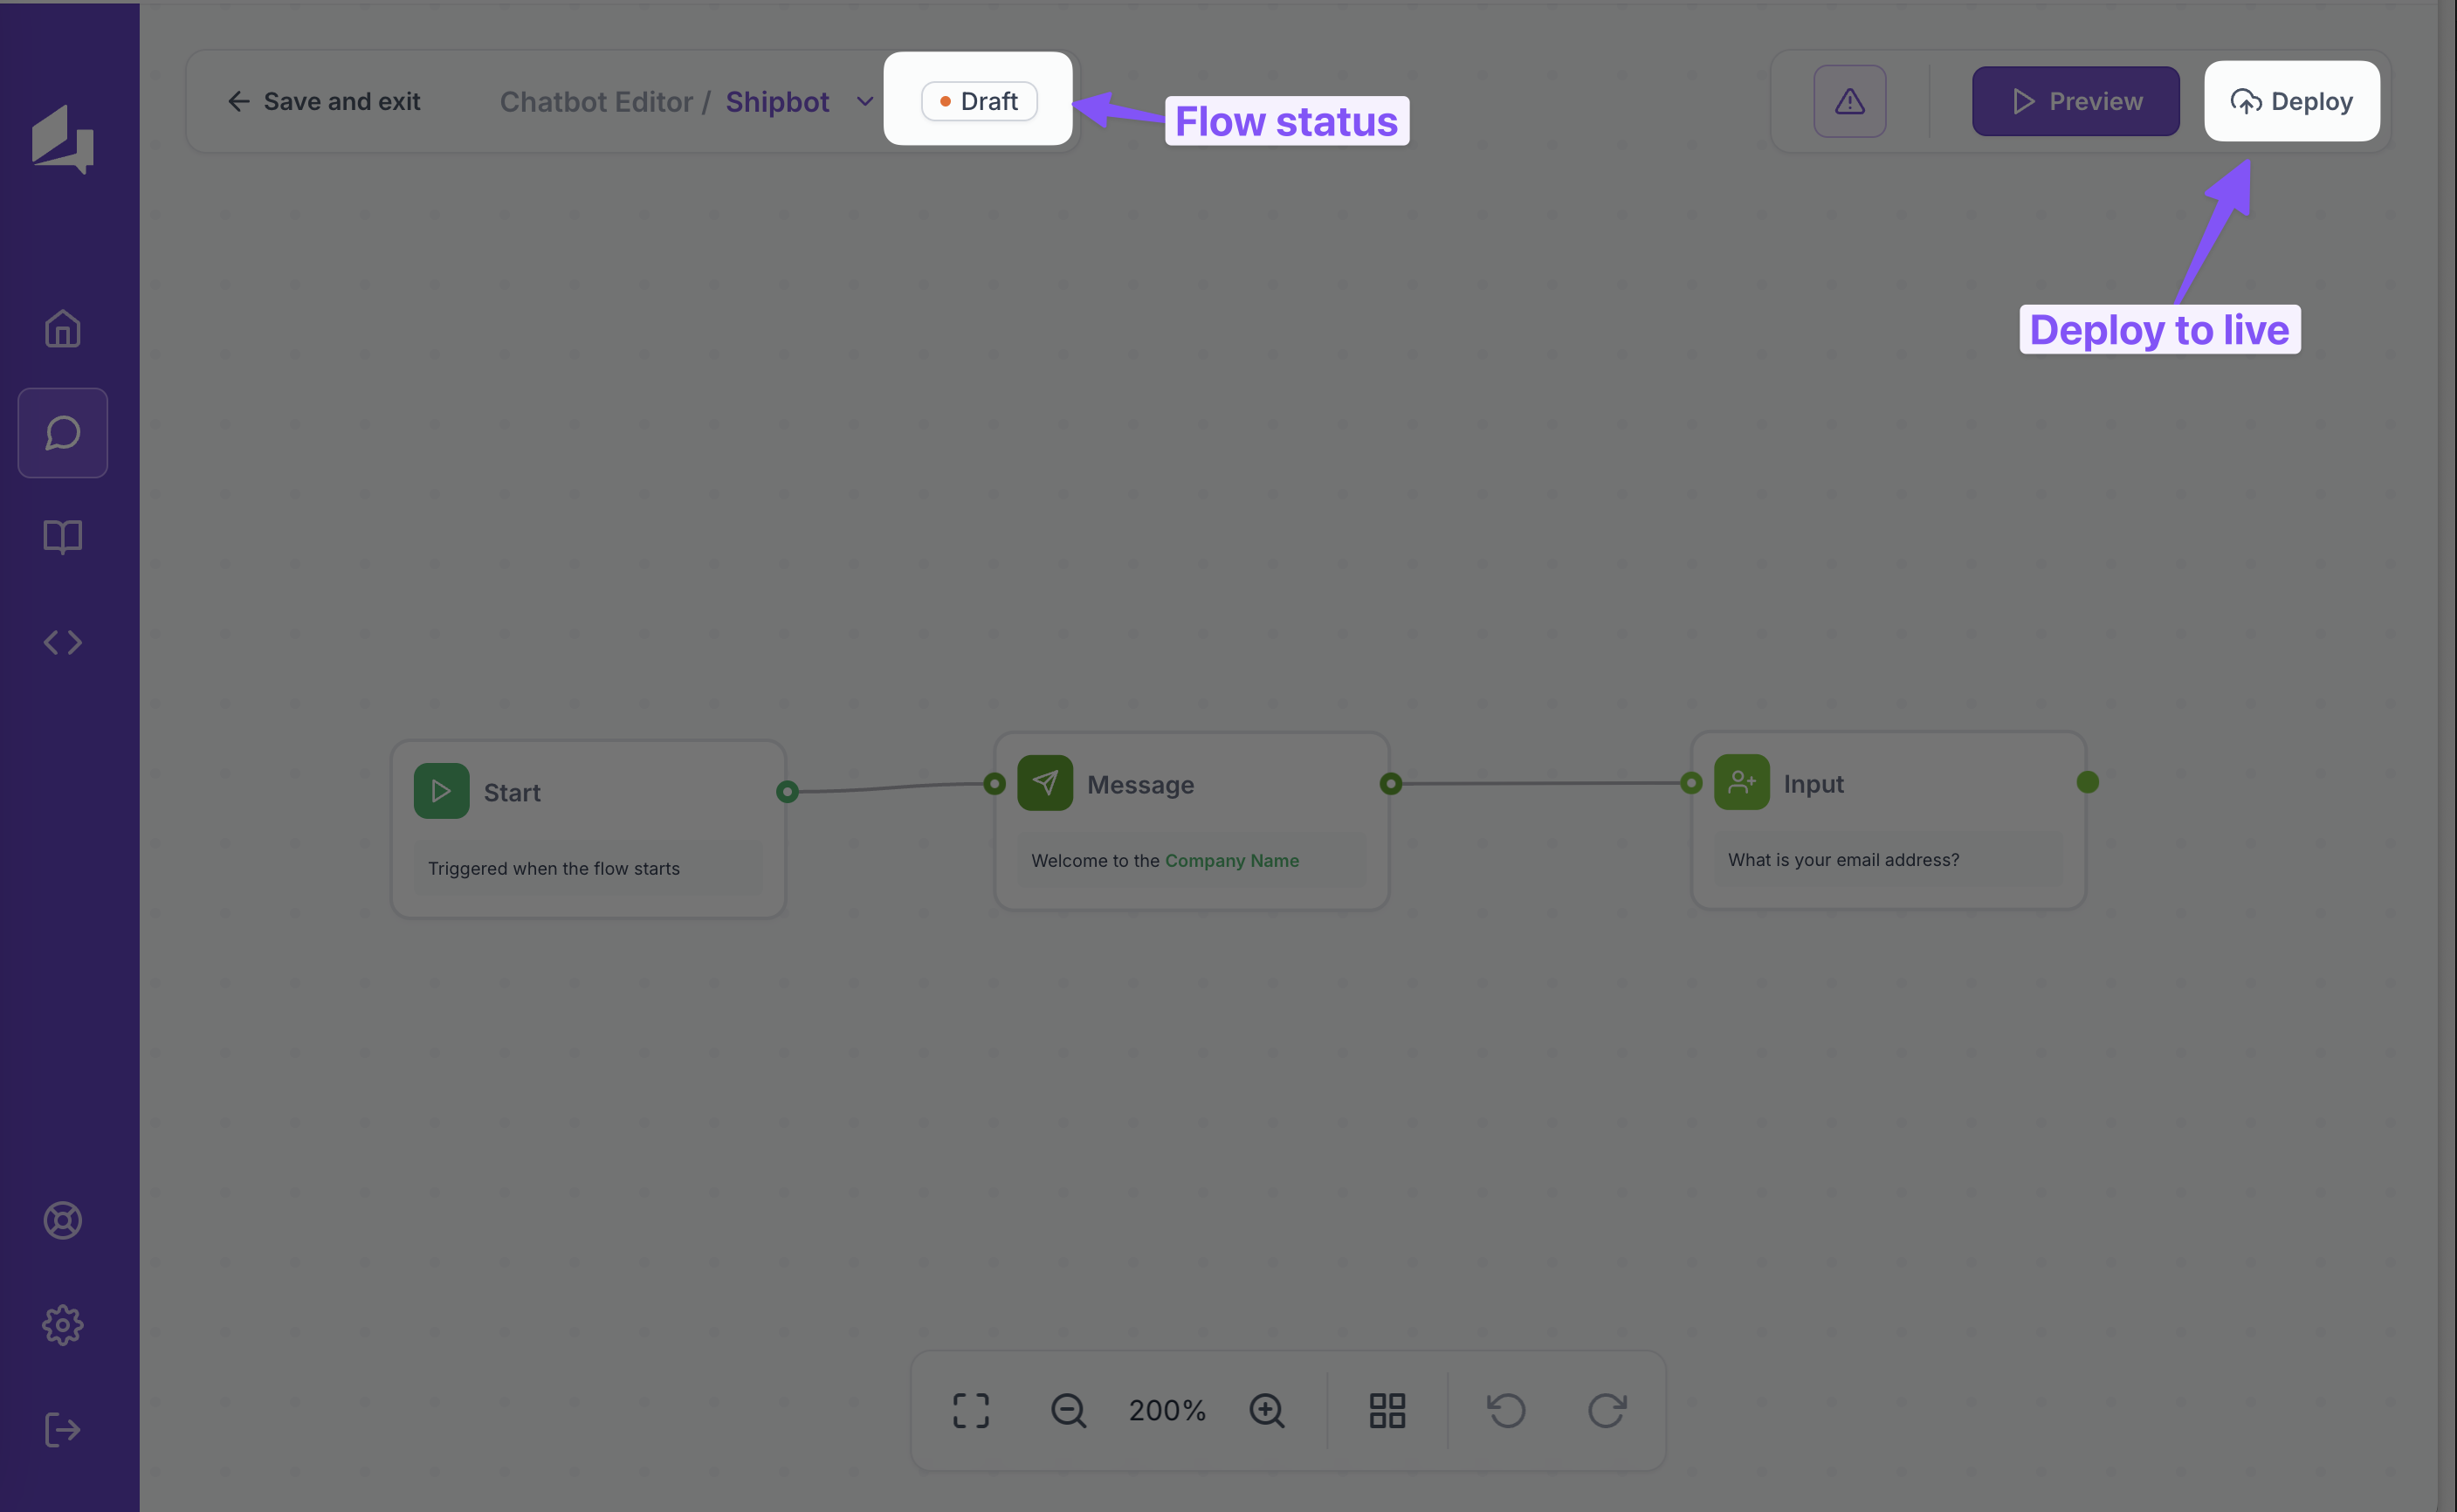
The flow status indicator in the top left corner of the canvas shows whether your flow is in draft mode or published.
Warning Checklist
Canvas provides error messages to help you identify and resolve issues in your flow.
You can see warnings and errors by clicking on the warning icon on top right corner of the canvas. Clicking on the error message will take you to the node that has the error.
Also, when an error occurs, you will see a warning icon on the bottom of the node that has the error. Clicking on the icon will display the error message as well.
Warnings are messages that indicate potential issues (e.g., node is not reachable) in your flow that may affect its behavior. They do not prevent you from deploying your flow, but it is recommended to resolve all warnings before deploying your flow.
Here is an example of a warning message:
Errors are messages that indicate critical issues (e.g., missing required fields, infinite loop without user message) in your flow that prevent you from deploying it. You must resolve all errors before you can deploy your flow.
Here is an example of an error message:
Best Practices
- Start with a clear goal: Define the purpose of your flow and the desired outcome.
- Keep it simple: Break down complex tasks into smaller, manageable steps.
- Test early and often: Use the preview feature to test your flow as you build it.
- Iterate and improve: Continuously refine your flow based on user feedback and analytics.
- Stay organized: Use proper naming conventions for variables to keep your flow easy to understand.
- Mistakes can happen: Use the undo/redo functionality to easily revert or reapply changes.
- Pay attention to warnings: Address any warnings in your flow to ensure optimal performance.